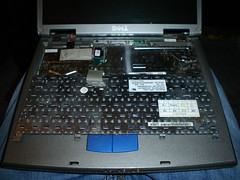
How To Replace A Dell Inspiron 5150 Laptop Heat Sink And Fan AssemblyFirst, I like to label the screws I’m going to remove on a piece of paper to avoid confusion. If there’s a lot, I like to use scotch tape to keep them all apart. In this case, we only have five screws, so no tape.
Also, you’ll need a slotted screwdriver and a Phillips head as well. The Phillips head should have a small point on it. Needle-nosed pliers will also make unlocking the ZIF CPU socket easier. Diving in, you want to pry up the top plate with a slotted screwdriver. Remember to open the laptop all the way (push the screen all the way back) to let the plate come up easily. There’s four or five plastic slots that will pop out as you pry the thing up. Go from right to left.
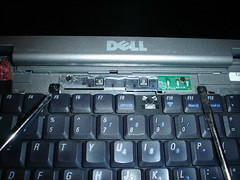
When you pull the top plate off, you’ll see four black screws. You’ll need to remove these to pull the keyboard up. I’ve pointed to them with my screwdrivers, but I’m sure you’ll see them.
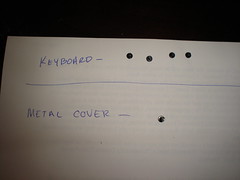
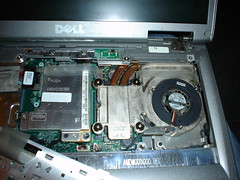
Remember. The keyboard should remain attached, so use care when lifting it out of the way. On the right side, you’ll see a metal cover protecting the heat sink, CPU, and other vital stuff from, well, you. Just remove that. It has only one screw, so they want you in there, anyway.
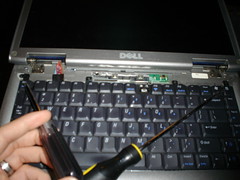
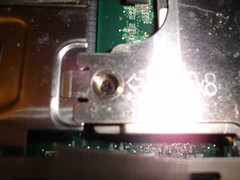
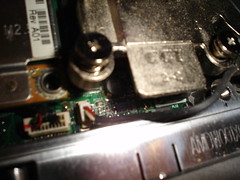
With the metal protective plate removed, you should see the heat sink / fan assembly and probably some dust. The assembly has four screws. Hold on. First, unlock the ZIF CPU socket before trying to pull the heatsink out.
Now throw the new one in there and lock the ZIF CPU socket again.
|
BAGI MAKLUMAN PEMEGANG SIJIL KEMAHIRAN MALAYSIA(SKM)SAHAJA.. 1. Adakah sijil kemahiran malaysia diiktraf atau di perakui oleh MQA (pengiktrafan kerajaan) atau badan professional seperti BEM,IEM,IEEE ? adakah sijil kemahiran malaysia diiktraf oleh universiti2 antarabangsa untuk tujuan sambung belajar? Jawapan: Untuk makluman, terdapat tiga sektor di dalam Kerangka Kelayakan Malaysia (MQF) iaitu sektor kemahiran, sektor vokasional dan teknikal dan sektor pengajian tinggi. Rujuk MQF di Lampiran A. Sektor vokasional dan teknikal serta pengajian tinggi adalah di bawah bidang kuasa Agensi Kelayakan Malaysia (MQA) manakala bagi sektor kemahiran adalah di bawah bidang kuasa Jabatan Pembangunan Kemahiran (JPK). Ini adalah berdasarkan akta kedua-dua agensi iaitu Akta Agensi Kelayakan Malaysia 2007 (Akta 679) dan Akta Pembangunan Kemahiran Kebangsaan 2006 (Akta 652). Program latihan dan persijilan di bawah sektor kemahiran adalah tidak memerlukan proses akreditasi/ pengiktirafan MQA. MQA dan JPK ...

Comments
Post a Comment